Welcome to the Pironman instructions guide‚ your comprehensive resource for assembling‚ configuring‚ and optimizing your Pironman setup. This guide ensures a seamless experience‚ covering installation‚ troubleshooting‚ and customization tailored for both newcomers and experienced users.
1.1 Overview of Pironman and Its Features
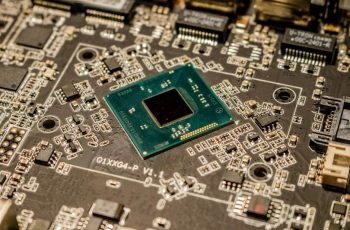
Pironman is a versatile Mini PC case designed for the Raspberry Pi 4‚ offering a compact and efficient solution for various projects. It supports multiple use cases‚ including NAS‚ Home Assistant‚ media centers‚ and AI-driven applications. The case features an expandable NVMe M.2 slot‚ compatible with sizes 2230‚ 2242‚ 2260‚ and 2280‚ enhancing performance. Its sleek design includes an integrated OLED screen and customizable RGB lighting for personalized aesthetics. Additionally‚ Pironman incorporates a smart cooling system with a temperature-controlled fan‚ ensuring optimal performance. With user-friendly assembly and robust features‚ Pironman is an ideal choice for both beginners and advanced users seeking a reliable and customizable setup;
1.2 Importance of Following the Instructions
Adhering to the Pironman instructions is crucial for a successful setup and optimal performance. Incorrect assembly or software installation can lead to hardware damage or functionality issues‚ especially with version-specific components. Properly identifying your Pironman version ensures compatibility and correct installation of the corresponding software. Failure to follow guidelines may result in power supply problems‚ RGB lighting malfunctions‚ or cooling system inefficiencies. First-time users should double-check connections and configurations to avoid common pitfalls. By following the instructions carefully‚ you ensure a seamless assembly process‚ prevent potential errors‚ and maximize the functionality of your Pironman setup for various applications like NAS‚ media centers‚ or AI projects.

System Compatibility and Requirements
Ensure your system meets Pironman’s compatibility standards. Verify supported OS versions and hardware specifications to avoid installation issues. Proper setup guarantees optimal performance and functionality across all features.
2.1 Supported Operating Systems for Pironman
Pironman is compatible with specific operating systems to ensure optimal performance. Supported OS includes Ubuntu‚ CentOS‚ and Raspberry Pi OS (both Lite and Desktop versions). Ensure your system runs on a compatible OS version. For Raspberry Pi 5‚ enable SPI and I2C interfaces via sudo raspi-config. If using an unsupported OS‚ follow the guide to install a compatible one. Proper OS setup is crucial for Pironman’s functionality and feature utilization. Verify your OS version before proceeding with installation to avoid compatibility issues and ensure a smooth setup experience.
2.2 Identifying Your Pironman Version
Identifying your Pironman version is essential for proper setup. Check the short link provided in your instruction sheet: if it’s pironman-v2.rtfd.io‚ you have Version 2. Version 1 uses a different setup process. Differences include motherboard structure and software installation steps. Ensure you follow the correct tutorial for your version to avoid compatibility issues. Incorrect installation can lead to malfunctioning features like RGB lights or fans. Verify your version before proceeding to ensure a seamless setup and optimal functionality of your Pironman device.

Component List and Assembly Instructions
Verify all components: motherboard‚ OLED screen‚ RGB strip‚ power button‚ and cables. Organize parts and follow step-by-step assembly instructions carefully to ensure proper connections and functionality.
3.1 Essential Components Included in the Kit
The Pironman kit includes a sleek aluminum alloy case‚ motherboard‚ OLED display‚ RGB light strip‚ cooling fan‚ power button‚ and necessary cables. Ensure all items are present before starting assembly. The motherboard supports Raspberry Pi 5 and features an expandable NVMe M.2 slot. The kit also contains short connectors for GPIO pins and thermal pads for heat management. Verify each component to avoid missing or damaged parts. If any items are missing‚ contact SunFounder support immediately to resolve the issue promptly. Properly sorting and stacking components will streamline the assembly process.
3.2 Step-by-Step Assembly Guide
Start by unboxing and organizing all components. Begin with the motherboard‚ carefully installing the Raspberry Pi and securing it with screws. Next‚ attach the OLED screen‚ ensuring proper alignment and connection to the GPIO pins. Install the RGB light strip and cooling fan‚ connecting their cables to the designated ports. Assemble the aluminum case by fitting the motherboard and components inside‚ then secure the case panels. Finally‚ connect the power supply and test the system. Refer to the provided diagrams for precise cable routing and connector placement. If issues arise‚ consult the official PDF manual or contact SunFounder support for assistance.

Software Installation and Setup
Install the Pironman service by cloning the GitHub repository and executing the install script. Ensure Python and Git are pre-installed for smooth installation. Restart the system post-installation for optimal functionality.
4.1 Installing the Pironman Service for Version 1
For Version 1‚ begin by updating your system packages using sudo apt-get update; Install essential tools like Git and Python by running sudo apt-get install git python3 python3-pip python3-setuptools -y. Navigate to the home directory and clone the Pironman repository with git clone https://github.com/sunfounder/pironman.git. Change directory to /pironman and execute the installation script using sudo python3 install.py. After installation‚ reboot your system to ensure all services start correctly. This setup ensures compatibility with Version 1 hardware‚ providing full functionality for your Pironman device.
4.2 Installing the Pironman Service for Version 2
For Version 2‚ start by updating your system with sudo apt-get update. Install required packages using sudo apt-get install git python3 python3-pip python3-setuptools -y. Clone the repository with git clone https://github.com/sunfounder/pironman.git -b v2.0‚ then navigate to /pironman and run sudo python3 install.py. Ensure the IO10 pin is connected via the shorting tab for proper RGB functionality. Enable SPI and I2C services by running sudo raspi-config and navigating to Interfacing Options. Restart your system to apply changes. This ensures Version 2-specific features are correctly implemented and functioning as intended.

Power Supply and Connections
— Use a dedicated power supply for both the Raspberry Pi and Pironman motherboard to ensure stable operation. Insufficient power can cause OLED screen issues or system shutdowns.
5.1 Connecting the Power Supply Correctly
To ensure stable operation‚ connect an external power supply to the Pironman motherboard. Use a separate power source for the Raspberry Pi and the Pironman to avoid insufficient power issues. For optimal performance‚ connect the power supply to the designated power connector on the motherboard. Ensure the voltage matches the specifications to prevent damage. If using a dual-power setup‚ verify that both the Pi and Pironman are powered independently. Avoid using low-quality adapters‚ as they may cause system instability. Always double-check the connections before turning on the power to prevent short circuits or component damage. Proper power supply setup is crucial for reliable operation.
5.2 Common Power-Related Issues and Solutions
Common power-related issues include insufficient power supply‚ unstable voltage‚ or incorrect connections. Symptoms may include system shutdowns‚ malfunctioning components‚ or the OLED screen displaying power-related warnings. To resolve these‚ ensure all connections are secure and use a high-quality power adapter with sufficient wattage. For dual-power setups‚ verify that both the Raspberry Pi and Pironman motherboard are powered independently. Avoid using low-quality adapters‚ as they may cause instability. If the OLED screen shows power issues‚ check the power connectors and ensure proper grounding. Always refer to the Pironman documentation for recommended power specifications to prevent damage and ensure reliable operation.

Troubleshooting Common Issues
Common issues include RGB light malfunctions‚ fan failures‚ and power-related problems. Check connections‚ logs‚ and software configurations. Ensure proper installation and enable necessary services for optimal performance.
6.1 Diagnosing and Fixing RGB Light Problems
6.2 Resolving Fan and Cooling System Issues
Fan issues typically relate to temperature thresholds or power supply problems. The fan activates when CPU temperature reaches 50°C (default setting) and stops below 48°C. To test functionality‚ lower the threshold using pironman -f 15. Ensure the fan connector is securely attached to the motherboard. If the fan doesn’t spin‚ check for power supply issues by connecting an external power source. Verify that the Pironman software is installed correctly and running without errors. For persistent issues‚ review system logs at /opt/pironman/log or contact support for further assistance.

Advanced Customization and Features
Explore advanced customization options for your Pironman‚ including RGB color changes‚ unique lighting patterns‚ and OLED screen personalization. Use commands like pironman -rc to modify colors effortlessly.
7.1 Changing RGB Light Colors and Patterns
7.2 Customizing the OLED Screen Display
Personalize your Pironman’s OLED screen by modifying the display settings. Access the configuration file using sudo nano /etc/pironman/config.json to edit text‚ colors‚ and layouts. Use hexadecimal codes to change text colors. Adjust the screen brightness with pironman -ct followed by a value (0-100). Customize the display layout by rearranging widgets or adding new ones. To show system information like CPU temperature‚ enable the system_info option. After making changes‚ reboot the system or run pironman -r to refresh the display. Ensure the OLED screen is properly connected to the I2C interface for optimal functionality.

User Experiences and Tips
Users share their Pironman assembly experiences‚ highlighting ease of setup and versatility. First-time assemblers recommend organizing components and double-checking connections for a smooth process. Troubleshooting is simplified with proper setup.
8.1 Tips for First-Time Assemblers
For first-time assemblers‚ organizing components and following the step-by-step guide is key. Use the provided checklist to ensure all parts are included. Double-check connections‚ especially FFC and FPC cables‚ to avoid poor contact. Test each component as you go to identify issues early. If unsure‚ refer to the manual or online tutorials. Join forums or communities for support. Patience is crucial; take your time to avoid mistakes. Familiarize yourself with the Pironman software before starting. Lastly‚ keep tools like a multimeter handy for troubleshooting. A well-prepared setup ensures a smooth assembly process.
8.2 Optimizing Performance for Specific Use Cases
Optimize your Pironman setup by tailoring it to your primary use case. For NAS or storage-heavy applications‚ ensure proper cooling and consider adding secondary storage. For Home Assistant or media centers‚ prioritize stable network connectivity and enable necessary services. If using it for AI projects‚ ensure adequate power supply and monitor CPU temperatures. Adjust fan thresholds for quieter operation in media setups or lower temperatures for AI workloads. Regularly update software and enable necessary interfaces like SPI or I2C for optimal functionality. Test configurations thoroughly to balance performance and reliability‚ ensuring your Pironman meets your specific needs efficiently.
With your Pironman setup complete‚ you’re ready to explore its full potential. Refer to the final checklist and resources for further assistance if needed.
9.1 Final Checklist for a Successful Setup
- Verify all components are included and undamaged.
- Ensure proper connections of FFC and FPC cables.
- Check the power supply and connections.
- Enable I2C and SPI services in Raspberry Pi configuration.
- Test OLED screen and RGB lights for functionality.
- Run diagnostics using the Pironman service.
- Ensure the cooling system is operating correctly.
This checklist ensures a smooth and trouble-free Pironman setup experience.
9.2 Resources for Further Assistance
For additional support‚ explore the following resources:
- Official Documentation: Visit the SunFounder website for detailed guides and troubleshooting tips.
- Community Forums: Engage with users on forums like SunFounder Forum for peer-to-peer advice.
- Video Tutorials: Watch assembly and setup videos on platforms like YouTube.
- Customer Support: Contact SunFounder directly for technical assistance.
- User Groups: Join social media groups dedicated to Pironman enthusiasts.
These resources ensure comprehensive support for resolving issues and optimizing your Pironman experience.