Welcome to the Honeywell 9000 Installation Manual. This guide provides comprehensive instructions for installing, wiring, and configuring your Wi-Fi-enabled thermostat. Ensure a safe and efficient setup with our detailed steps.
1.1 Overview of the Honeywell 9000 Thermostat
The Honeywell 9000 thermostat is a Wi-Fi-enabled, color touchscreen device designed for smart home integration. It offers advanced features like geofencing, scheduling, and remote access via Honeywell’s Total Connect Comfort app. Compatible with various HVAC systems, including conventional and heat pump configurations, this thermostat ensures efficient temperature control. Its intuitive interface and programmable settings make it user-friendly for both residential and light commercial applications. The Honeywell 9000 is built to enhance comfort and energy efficiency, providing seamless integration with smart home ecosystems while maintaining reliability and ease of use.
1.2 Importance of Proper Installation
Proper installation of the Honeywell 9000 thermostat is crucial for ensuring optimal performance, safety, and energy efficiency. Incorrect wiring or setup can lead to system malfunctions, increased energy consumption, or even safety hazards. By following the manual’s guidelines, you ensure that the thermostat operates seamlessly with your HVAC system. Proper installation also guarantees compliance with safety standards and maintains warranty validity. Additionally, it prevents potential damage to the device or connected systems. Always refer to the official Honeywell 9000 installation manual for precise instructions tailored to your specific setup, ensuring a smooth and reliable operation of your smart thermostat.
Pre-Installation Requirements
Ensure your HVAC system is compatible with the Honeywell 9000 thermostat. Gather all necessary tools and materials, and review safety precautions before starting the installation process;
2.1 Compatibility Check for HVAC Systems
Before installing the Honeywell 9000 thermostat, verify compatibility with your HVAC system. The thermostat supports both conventional and heat pump systems. Ensure your system includes a compatible transformer and that the wiring matches the terminal designations. Check if your HVAC system requires a common wire (C-wire) or if it uses a dual-transformer setup. For heat pumps, confirm the correct wiring for the changeover valve. Additionally, ensure your system’s power requirements align with the thermostat’s specifications. Refer to your HVAC system’s manual to confirm compatibility and avoid installation issues. Proper compatibility ensures optimal performance and prevents potential malfunctions.
2.2 Tools and Materials Needed
To install the Honeywell 9000 thermostat, gather the necessary tools and materials. You will need a screwdriver (both Phillips and flathead), pliers, wire strippers, and a drill with bits. A voltage tester is essential to ensure safe handling of electrical wires. Additionally, check for any specific materials like wall anchors or screws provided with the thermostat. Ensure you have the Honeywell 9000 manual handy for reference. Proper preparation of tools and materials will streamline the installation process and minimize potential delays. Always refer to the manual for specific requirements tailored to your system.
2.3 Safety Precautions
Before starting the installation, ensure all safety precautions are followed. Switch off the power supply to the HVAC system at the circuit breaker or fuse box. Verify the power is off using a voltage tester to avoid electrical shock. Handle all electrical components with care, as improper handling can damage the system or cause injury. Do not attempt to install the thermostat if you are unsure about any step. If your system is complex or you lack experience, consider hiring a licensed technician. Always follow the manufacturer’s guidelines and local safety regulations to ensure a safe and successful installation.
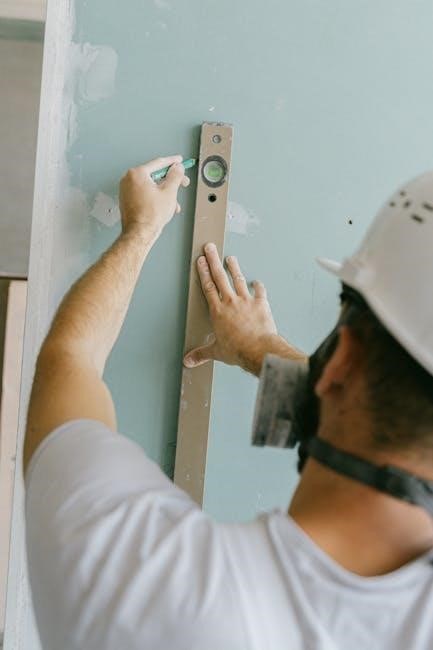
Physical Installation of the Honeywell 9000
Mount the wallplate securely, ensuring it is level. Attach the thermostat to the wallplate, aligning it properly. Leveling ensures accurate temperature sensing and proper functionality of the device.
3.1 Mounting the Thermostat
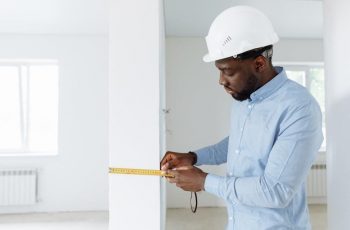
Begin by removing the old thermostat and disconnecting the wires. Take the wallplate from the Honeywell 9000 kit and attach it to the wall using the provided screws. Ensure the wallplate is level and securely fastened. If necessary, drill pilot holes for the screws to avoid damaging the wall. Once the wallplate is mounted, carefully align the thermostat with the wallplate’s tabs. Gently push the thermostat onto the wallplate until it clicks into place. Make sure it is properly seated and aligned for accurate temperature sensing. Double-check that the thermostat is level to ensure proper functionality and display accuracy.
3.2 Wallplate Installation
Before mounting the thermostat, install the wallplate. Remove the old thermostat and any existing wallplate. Take the wallplate from the Honeywell 9000 kit and position it on the wall. Use a level to ensure it is straight, then mark the screw holes with a pencil. Drill pilot holes if necessary, especially for drywall or plaster. Insert the provided wall anchors into the holes for added stability. Screw the wallplate into place using the supplied screws. If no old thermostat was present, ensure the wallplate is centered and secure. For uneven surfaces, use the included spacers to level the wallplate. Once installed, proceed to mount the thermostat.
3.3 Leveling the Thermostat
Proper leveling ensures the thermostat operates accurately. Use a level tool to check the wallplate and thermostat alignment. If the wallplate is uneven, adjust it using the included spacers or shims. Gently tilt the thermostat to align the bubble in the level tool’s center. Secure the thermostat firmly to the wallplate, ensuring it sits straight. An unlevel thermostat may cause touch screen inaccuracies or sensor malfunctions. Double-check the leveling after installation to confirm proper alignment. This step is crucial for maintaining consistent heating and cooling performance. Once leveled, your Honeywell 9000 is ready for wiring and configuration.
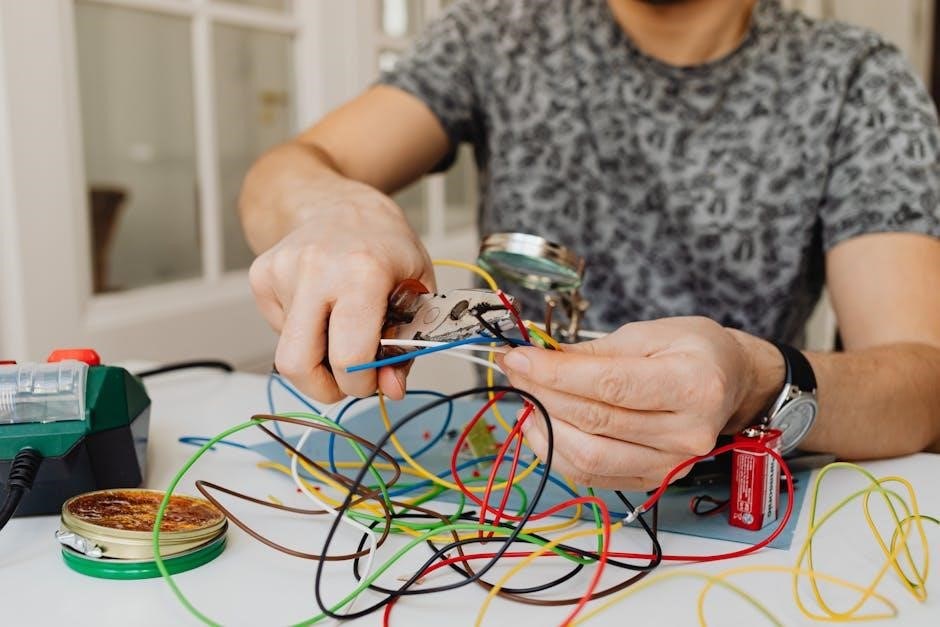
Wiring Guide for the Honeywell 9000
The wiring guide provides step-by-step instructions for connecting the thermostat to your HVAC system. Always refer to the terminal designations and ensure correct wire connections for proper functionality.
4.1 Terminal Designations
Understanding the terminal designations is crucial for proper wiring. The Rc terminal connects to the cooling power source, while R handles heating power. The W-O/B terminal controls the first-stage heat relay or heat pump changeover valve. The C terminal is the common wire from the secondary side of the transformer. Correct terminal connections ensure safe and efficient operation. Always match wires to their designated terminals to avoid system malfunctions. Refer to the manual for specific wiring configurations tailored to your HVAC system type, such as conventional or heat pump setups. Proper connections are essential for optimal performance and safety.
4.2 Wiring for Conventional Systems
For conventional HVAC systems, begin by connecting the R terminal to the heating power source and the Rc terminal to the cooling power. The W-O/B terminal is used for the first-stage heat relay or heat pump changeover valve. Connect the C terminal to the common wire from the transformer’s secondary side. Ensure all wires are securely attached to their respective terminals. Refer to the wiring diagram in the manual for precise connections. Double-check the wire colors and their designated terminals to avoid mismatches. After wiring, test the system to ensure proper functionality. Correct connections are vital for safe and efficient operation of your Honeywell 9000 thermostat.
4.3 Wiring for Heat Pump Systems
For heat pump systems, connect the R terminal to the heating power source and the Rc terminal to the cooling power source. The W-O/B terminal controls the heat pump’s changeover valve, determining whether the system is in heating or cooling mode. Connect the C terminal to the common wire from the transformer’s secondary side. Ensure the wiring matches your heat pump’s configuration, as improper connections can damage the system. If your heat pump has two stages, connect the auxiliary stage wire to the W2 terminal. Refer to the wiring diagram for specific heat pump configurations. Double-check all connections before powering on the system to ensure proper operation and safety.

Connecting to Wi-Fi Network
To connect your Honeywell 9000 thermostat to a Wi-Fi network, go to the menu, select Wi-Fi setup, choose your network, and enter the password. Ensure stability for smart features.
5.1 Steps to Connect to Wi-Fi
To connect your Honeywell 9000 thermostat to a Wi-Fi network, follow these steps:
Power on the thermostat and navigate to the Menu.
Select Wi-Fi Setup and choose your network from the list.
Enter your network password using the touchscreen keyboard.
Wait for the thermostat to establish a connection.
Once connected, the thermostat will confirm successful setup.
Ensure your router is compatible with 2.4 GHz networks, as the Honeywell 9000 does not support 5 GHz. If issues arise, restart the thermostat or check your network settings. Proper Wi-Fi connection enables remote control via the Honeywell Home app and smart home integration.
5.2 Troubleshooting Wi-Fi Connectivity
If your Honeywell 9000 thermostat fails to connect to Wi-Fi, follow these troubleshooting steps:
Restart the thermostat by turning it off and on.
Ensure your router is broadcasting a 2.4 GHz network, as the thermostat does not support 5 GHz.
Verify the Wi-Fi password is entered correctly.
Move the router closer to the thermostat to improve signal strength.
Check for physical obstructions that may block the signal.
Reset the network settings on the thermostat and reconnect.
If issues persist, consult the Honeywell Home app or contact customer support for further assistance. Proper connectivity is essential for smart features and remote access.

Configuring Advanced Settings
Configure advanced settings to optimize your Honeywell 9000 thermostat’s performance. Adjust heating/cooling preferences, set schedules, and enable geofencing for smart home integration. Customize settings for energy efficiency and convenience.
6.1 Setting Up Heating and Cooling Preferences
To configure heating and cooling preferences on your Honeywell 9000 thermostat, navigate to the “Preferences” or “Settings” menu. Here, you can set your desired temperatures for different times of the day or events, such as when you’re home, away, or asleep. This feature allows you to customize your comfort levels and energy usage. Additionally, you can enable geofencing, which uses your smartphone’s location to automatically adjust the temperature based on your proximity to home. Some models also offer the option to set a temperature range, optimizing energy efficiency by allowing slight fluctuations. For advanced setups, explore smart home integrations to control your thermostat via voice commands or through a dedicated app. Adjusting these settings ensures your thermostat operates in harmony with your lifestyle and preferences, enhancing both comfort and energy savings.
6;2 Scheduling and Programming
The Honeywell 9000 thermostat allows you to create a customized schedule to regulate your home’s temperature based on your daily routine. Using the touchscreen interface or the Honeywell Home app, you can program different temperature settings for specific times of the day, such as waking up, leaving for work, or returning home. For added convenience, you can set separate schedules for weekdays and weekends. The thermostat also supports smart home integration, enabling voice control through platforms like Amazon Alexa or Google Assistant. By programming your schedule, you can optimize energy usage and ensure consistent comfort without manual adjustments. Regularly review and update your settings to reflect changes in your lifestyle or preferences for maximum efficiency.
6.3 Geofencing and Smart Home Integration
Enhance your Honeywell 9000 thermostat’s functionality with geofencing and smart home integration. Geofencing uses your smartphone’s location to automatically adjust temperatures when you leave or arrive home, optimizing energy usage and comfort. Through platforms like Amazon Alexa or Google Assistant, you can voice-control your thermostat or integrate it with other smart devices for a seamless experience. The Honeywell Home app allows remote temperature adjustments and scheduling. Additionally, smart home integration enables scenarios like turning off the HVAC system when no one is home or adjusting settings based on your daily routine. These features ensure convenience, efficiency, and tailored comfort without manual intervention.
Maintenance and Upkeep
Regularly clean the thermostat’s touchscreen and sensors for optimal performance. Check for software updates to ensure the latest features and security. Replace batteries promptly when needed.
7.1 Cleaning the Thermostat
Regular cleaning ensures optimal performance and longevity of your Honeywell 9000 thermostat. Use a soft, dry cloth to wipe the touchscreen and exterior surfaces. Avoid harsh chemicals or abrasive materials that may damage the screen or housing.
For deeper cleaning, gently dampen a cloth with water, but ensure no moisture seeps into the device. Power off the thermostat before cleaning to prevent electrical issues. Clean the sensors and vents to maintain accurate temperature readings. Repeat this process every 2-3 months or as needed to keep your thermostat functioning smoothly.
7.2 Software Updates
Regular software updates are essential to ensure your Honeywell 9000 thermostat operates with the latest features and security patches. To check for updates, navigate to the thermostat’s menu, select “Settings,” and then “Software Update.” A stable Wi-Fi connection is required for automatic updates. If an update is available, follow the on-screen instructions to download and install it. The thermostat will restart during the process, but your settings will be preserved.
For manual updates, download the latest firmware from Honeywell’s official website and transfer it to the thermostat using a USB cable. Always verify the source of the update to avoid unauthorized software. Updates ensure optimal performance and compatibility with smart home systems.
7.3 Battery Replacement (if applicable)
For Honeywell 9000 models with battery power, replacement is straightforward. Locate the battery compartment, usually found on the rear or bottom of the thermostat. Ensure you purchase the correct battery type, often AA or AAA, as specified in the manual or on the compartment label.
Switch off the thermostat’s power at the circuit breaker to avoid electrical issues. Open the compartment, remove the old battery, and insert the new one, aligning the positive terminal correctly. Close the compartment, restore power, and test the thermostat to confirm proper function. If issues persist, consult the manual for further troubleshooting guidance.
Troubleshooting Common Issues
Identify and resolve common issues like connectivity problems or temperature inaccuracies by checking wiring connections, restarting the system, and referring to the manual for specific solutions.
8.1 Display Issues
If the display is blank, unresponsive, or showing incorrect information, restart the thermostat by removing and reinserting the batteries or resetting the power. Ensure the thermostat is properly connected to the HVAC system. Check for firmware updates, as outdated software may cause display malfunctions. Clean the touchscreen gently with a soft cloth to remove dirt or smudges that might interfere with responsiveness. If issues persist, verify wiring connections or consult the manual for advanced troubleshooting steps. For severe display problems, contact Honeywell support for assistance or potential hardware repair. Always refer to the manual for specific guidance on resolving display-related concerns effectively.
8.2 Temperature Control Problems
If the thermostat fails to regulate temperature accurately, check wiring connections, especially the C (common) and R (heating/cooling) wires, to ensure they are secure. Verify that the system is configured correctly for your HVAC setup, such as heat pump or conventional systems. If the thermostat cycles excessively, inspect the wiring for short circuits or incorrect connections. Ensure the thermostat is properly leveled and calibrated. Review the scheduling and temperature preferences to confirm they are set correctly. If issues persist, reset the thermostat or perform a factory reset. For unresolved problems, consult the manual or contact Honeywell support for further assistance or potential hardware evaluation. Always follow safety guidelines when troubleshooting electrical components.
8.3 Connectivity Issues
If your Honeywell 9000 thermostat experiences connectivity issues, ensure it is properly connected to your Wi-Fi network. Verify the network name and password are entered correctly. Restart your router and thermostat to refresh the connection. Check for physical obstructions between the thermostat and router, as they can weaken the signal. Ensure the thermostat is running the latest firmware. If issues persist, reset the thermostat to factory settings and retry the Wi-Fi setup. For advanced troubleshooting, refer to the manual or contact Honeywell support. Connectivity problems can often be resolved by re-establishing the network connection or updating the device’s software. Always follow the troubleshooting steps in sequence to identify and resolve the issue effectively.
Accessories and Replacement Parts
Explore compatible accessories like wallplates, touchscreens, and batteries for your Honeywell 9000. Replacement parts, including wiring modules, are available through Honeywell’s official website or authorized dealers. Ensure authenticity by purchasing from trusted sources to maintain performance and warranty validity. Refer to the manual for a complete list of approved accessories and parts. Visit Honeywell’s support page for easy ordering and detailed product specifications. Genuine parts guarantee optimal functionality and compatibility with your thermostat system. Always verify the model number, such as TH9320WF5003, when ordering replacements to ensure a perfect fit. For further assistance, contact Honeywell customer support directly. Properly installed genuine parts will enhance the lifespan and efficiency of your thermostat.
9.1 Compatible Accessories
The Honeywell 9000 thermostat supports a range of compatible accessories designed to enhance functionality and user experience. These include wallplates, touchscreen replacements, and advanced wiring modules. Ensure all accessories are purchased from Honeywell’s official website or authorized dealers to guarantee compatibility and maintain warranty coverage. Key accessories like the wallplate ensure a clean installation, while optional modules can add features like geofencing or smart home integration. For detailed compatibility, refer to the manual or visit Honeywell’s support page. Always verify the model number, such as TH9320WF5003, before ordering. Genuine parts ensure optimal performance and system longevity.
9.2 Ordering Replacement Parts
Ordering replacement parts for your Honeywell 9000 thermostat is straightforward. Visit Honeywell’s official website or contact authorized dealers to purchase genuine parts. Ensure compatibility by referencing your thermostat’s model number, such as TH9320WF5003. Avoid third-party sellers to maintain warranty validity. Replacement parts include touchscreens, wallplates, and wiring modules. For assistance, call Honeywell’s customer support or use their online chat. Always verify part numbers and descriptions before ordering to ensure accuracy. Genuine Honeywell parts guarantee optimal performance and longevity of your thermostat. Keep your system running smoothly with authentic replacements tailored to your specific model. Visit Honeywell’s website for a seamless experience.
Regulatory and Compliance Information
The Honeywell 9000 thermostat complies with EMC standards and safety certifications. Ensure installation adheres to local regulations and refer to the manual for detailed compliance information. Learn more.
10.1 EMC Compliance
The Honeywell 9000 thermostat is designed to meet Electromagnetic Compatibility (EMC) standards, ensuring it does not emit harmful electromagnetic interference. Compliance with EN 61800-3 (2004) guarantees proper operation in IT environments. This certification ensures the thermostat functions reliably without interfering with other electronic devices. Adherence to EMC standards is crucial for maintaining system performance and safety. Always verify local regulations to ensure compliance. For detailed specifications, refer to the official Honeywell website or consult the product manual. Proper installation and use are essential to uphold EMC compliance and overall system integrity.
10.2 Safety Certifications
The Honeywell 9000 thermostat adheres to rigorous safety standards, ensuring reliability and user protection. It meets certifications from reputable organizations such as UL (Underwriters Laboratories) and ETL (Intertek), guaranteeing compliance with international safety norms. These certifications verify that the thermostat is designed to prevent hazards and operate safely under normal conditions. Always ensure the product is installed according to the manual to maintain its safety certifications. For more details, visit the Honeywell website. Proper installation and adherence to guidelines are essential to uphold safety and performance standards.
Thank you for following the Honeywell 9000 Installation Manual. Proper installation ensures optimal performance. For further support, visit Honeywell’s official website or contact customer service.
11.1 Final Checks and Verification
After completing the installation, perform a final check to ensure everything functions correctly. Verify that the thermostat powers on, the display is clear, and all buttons respond. Check Wi-Fi connectivity to confirm successful network integration. Test heating, cooling, and fan operations to ensure proper system responses. Review wiring connections for accuracy and security. Schedule a quick system test to verify temperature adjustments and programmed settings. Refer to the manual for troubleshooting common issues. Ensure all safety precautions and advanced features are enabled. For additional support, visit the Honeywell website or contact customer service.
11.2 Resources for Further Support
If you encounter issues or need additional assistance, visit the Honeywell website for detailed support resources. Explore the FAQ section, downloadable PDF manuals, and troubleshooting guides. Contact Honeywell Customer Support directly for personalized help or technical queries. For advanced setups, refer to the user guide or installation manual available online. Ensure to register your thermostat on the Total Connect Comfort platform for remote monitoring and updates. Additional support materials, including video tutorials and community forums, are accessible through Honeywell’s official channels. Reach out to certified professionals if further assistance is required.